Ender-3 Pro, Cura settings
16/08/2023
@ Saigon
3D Print
I. Low Quality - 0.25mm
Latest Update: 16/8/2023
Downdown cura profile here: Dropbox link
![[0.25mm] Global Setting](/image/posts/2023-08-16-Ender-3-Pro-Cura-settings/1.png)
![[0.25mm] Extruder Setting](/image/posts/2023-08-16-Ender-3-Pro-Cura-settings/2.png)
Latest Update: 16/8/2023
Downdown cura profile here: Dropbox link

Example error:
iex(2)> App.OracleRepo.get(App.BigBigBigDocument, 3573564)
** (DBConnection.ConnectionError) {:badmatch, <<253, 249, 243, 207, 63, 219, 35, 182, 23, 177, 72, ...>>}
    (ecto_sql 3.8.3) lib/ecto/adapters/sql.ex:932: Ecto.Adapters.SQL.raise_sql_call_error/1
    (ecto_sql 3.8.3) lib/ecto/adapters/sql.ex:847: Ecto.Adapters.SQL.execute/6
    (ecto 3.8.4) lib/ecto/repo/queryable.ex:221: Ecto.Repo.Queryable.execute/4
    (ecto 3.8.4) lib/ecto/repo/queryable.ex:19: Ecto.Repo.Queryable.all/3
    (ecto 3.8.4) lib/ecto/repo/queryable.ex:147: Ecto.Repo.Queryable.one/3
iex(2)> {"level":"error","message":"Jamdb.Oracle (#PID<0.889.0>) disconnected: ** (DBConnection.ConnectionError) {:badmatch, <<253, 249, 243,  173, 123, 177, 72, ...>>}","timestamp":"2023-08-11T03:51:46.563Z"}
Solution: Add connection parameter named :read_timeout in repo config. In the follow example, I change :read_timeout to 5 minutes, see line 11.
Besides, I add :timeout to :infinity, see line 10.
1
2
3
4
5
6
7
8
9
10
11
config :app, App.OracleRepo,
  hostname: "******",
  port: 1521,
  database: "******",
  username: "******",
  password: "******",
  stacktrace: true,
  show_sensitive_data_on_connection_error: true,
  pool_size: 10,
  timeout: :infinity,
  parameters: [ read_timeout: :timer.minutes(5)]
First of all, let start with definition of reaml, it’s what I got from KeyCloak official website.
Realms A realm manages a set of users, credentials, roles, and groups. A user belongs to and logs into a realm. Realms are isolated from one another and can only manage and authenticate the users that they control.
Realms (Tiếng Việt): cõi, địa hạt, vương quốc, vùng Một realm quản lý một tập hợp user, thông tin xác thực - credential, role và group. Một user sẽ thuộc một realm, một realm sẽ có nhiều user, user sẽ đăng nhập vào reaml mà nó thuộc về. Một server KeyCloak tạo được rất nhiều realm, và chúng bị cô lập với nhau. Những realm này chỉ có thể quản lý và cho đăng nhập những user mà chúng quản lý.
As the definition of realm , this step is only used for testing only, normaly, if your KeyCloak did create a realm, you can skip this step and go to step 2.
![[1] Add a new realm.](/image/posts/2023-07-27-How-to-configure-KeyCloak-to-support-Redash-SAML-SSO/1.png)
![[2] Create realm's client](/image/posts/2023-07-27-How-to-configure-KeyCloak-to-support-Redash-SAML-SSO/2.png)
In new client form, I would like to input the following parameters, then submit.
redashsamlAfter that, edit that new client named redash
![[3] Edit Redash client](/image/posts/2023-07-27-How-to-configure-KeyCloak-to-support-Redash-SAML-SSO/3.png)
Client ID: redash
RedashemptyonoffoffkeycloaksamlonoffoffoffonRSA_SHA256KEY_IDEXCLUSIVE_WITH_COMMENTSoffoffoffoffoffoffemailignoredhttps://redash.local-domain.com/*https://redash.local-domain.com/https://redash.local-domain.com/saml/callback?org_slug=defaultignoredignoredignoredignoredignored![[4] Client settings](/image/posts/2023-07-27-How-to-configure-KeyCloak-to-support-Redash-SAML-SSO/4.png)
In the saml response that Redash expected to received, it requires
FirstNameLastNameHowever, in the KeyCloak, the attribute names are different from what Redash expected, as a consequence, we need to configure client’s mappers
For first name and last name, use Add Builtin feature.
![[5] First name and last name mappers](/image/posts/2023-07-27-How-to-configure-KeyCloak-to-support-Redash-SAML-SSO/5.png)
![[6] First name and last name mapper detail](/image/posts/2023-07-27-How-to-configure-KeyCloak-to-support-Redash-SAML-SSO/6.png)
lastNameLastNameLastNamefirstNameFirstNameFirstNameAfter login using admin credential, go to Settings → General → Saml
Enable (Dynamic)https://keyclock.local-domain.com/apps/keycloak/realms/{REALM_NAME}/protocol/saml/descriptorredashurn:oasis:names:tc:SAML:1.1:nameid-format:emailAddress![[7] Redash’s SAML configuration](/image/posts/2023-07-27-How-to-configure-KeyCloak-to-support-Redash-SAML-SSO/7.png)
You are done! Enjoy!
![[1] File → Project Properties](/image/posts/2023-06-21-Talend-How-to-export-log-in-JSON-Format/1.png)
![[2] Activate log4j in components](/image/posts/2023-06-21-Talend-How-to-export-log-in-JSON-Format/2.png)
In the Log4j template, use the following template.
<?xml version="1.0" encoding="UTF-8"?>
<Configuration >
  <Appenders>
    <Console name="Console" target="SYSTEM_OUT">
      <PatternLayout  >
        <pattern>
          { "timestamp":"%d{ISO8601}{GMT+0}", "level":"%level", "category":"%c", "message":"%enc{%m}{JSON}" }%n
        </pattern>
      </PatternLayout>
    </Console>
  </Appenders>

  <Loggers>
    <Root level="INFO">
      <AppenderRef ref="Console" />
    </Root>
  </Loggers>
</Configuration>![[3] tJava](/image/posts/2023-06-21-Talend-How-to-export-log-in-JSON-Format/3.png)
String message = "Hello World";
log.fatal(message);
log.error(message);
log.warn(message);
log.info(message);
log.debug(message);
log.trace(message);import org.apache.logging.log4j.Logger;
import org.apache.logging.log4j.LogManager;You then can RUN your talend job, the output should look like the following.
![[4] Basic Run - Console](/image/posts/2023-06-21-Talend-How-to-export-log-in-JSON-Format/4.png)
Trong bài hướng dẫn này, chúng ta sẽ tìm cách nâng cấp firmware cho máy in 3D Creality Ender-3 Pro. Trước khi đi vào chi tiết, đây là thông số máy in 3D của tôi trước khi nâng cấp.
Cá nhân tôi khi bắt đầu mò mẫm cài đặt firmware mới, tôi cảm giác mình đang đi vào một cái lỗ thỏ. Đây là những phần việc chính mà chúng ta sẽ làm
Đây là cách các phần cứng nối với nhau.
Ở bước này, tôi sẽ dụng Arduino UNO như một công cụ trung gian để rồi cài đặt bootloader cho máy in 3D.
Để tránh nhầm lẫn, chỉ cắm Arduino UNO vào máy tính, chúng ta chưa kết nối thứ gì vào máy in 3D.
![[1] Hardware Links](/image/posts/2023-05-20-Huong-dan-cach-update-firmware-cho-Ender-3-Pro/1.png)
Sau khi cắm Arduino UNO vào máy tính, mở phần mềm Arduino IDE, chọn File > Example > 11. ArduinoISP > ArduinoISP.
![[2] ArduinoISP](/image/posts/2023-05-20-Huong-dan-cach-update-firmware-cho-Ender-3-Pro/2.png)
Ở mục Tools > Programmer hãy chọn AVRISP mkII . Sau đó, hãy verify và upload sketch này lên Arduino UNO.
Lưu ý là vẫn giữ kết nối giữa máy tính và Arduino sau khi upload thành công.
Bây giờ là lúc cắm Arduino UNO vào máy in 3D Creality Ender-3 Pro thông qua cổng ISP. Các linh kiện sẽ kết nối như thế này.
![[3] Hardware links](/image/posts/2023-05-20-Huong-dan-cach-update-firmware-cho-Ender-3-Pro/3.png)
Đây là mạch của máy in 3D.
![[4] Creality3D v1.1.4 & ISP jacks](/image/posts/2023-05-20-Huong-dan-cach-update-firmware-cho-Ender-3-Pro/4.png)
Còn đây là mạch Arduino UNO. Khi nối dây, lưu ý là socket số 10 của Arduino sẽ nối vào chân số 3 trên mạch máy in 3D. Các chân còn lại 1, 2, 4, 5, 6 nối như bình thường.
![[5] Arduino UNO & ISP jacks](/image/posts/2023-05-20-Huong-dan-cach-update-firmware-cho-Ender-3-Pro/5.png)
Sau khi kết nối mạch máy in 3D vào Arduino UNO, mặc dù chúng ta không cấp nguồn cho mạch máy in 3D, màn hình vẫn sẽ sáng vì nó lấy điện thông qua Arduino.
Giờ chúng ta quay trở lại với chương trình Arduino IDE để burn bootloader vào mạch máy in 3D thông qua Arduino UNO. Thao tác như sau
Tools > Board , chọn Sanguino,Tools > Port, vẫn giữ port cũ, cái mà đang kết nối với Arduino.Tools → Processor, chọn ATmega1284 or ATmega1284P (16MHz)Tools → Programmer, chọn Arduino as ISP (quan trọng)Sau đó, ấn nút Tools → Burn Bootloader . Lúc này bootloader sẽ được cài vào mạch máy in 3D thông qua Arduino UNO.
Màn hình của máy in 3D sẽ có màu xanh, không có chữ gì cả. Đừng lo lắng. Bootloader đã cài đặt thành công rồi.
Bây giờ hãy tháo Arduino UNO và cable ISP, vai trò của Arduino UNO đã kết thúc.
Bước đầu tiên, hãy download Marlin Firmware va Marlin Configration ở link dưới đây https://marlinfw.org/meta/download/
![[6] Marlin Firmware Downloads](/image/posts/2023-05-20-Huong-dan-cach-update-firmware-cho-Ender-3-Pro/6.png)
Từ bây giờ, tôi sẽ gọi thư mục sau khi giải nén MarlinFirmware.zip là thư mục MarlinFirmware, còn thư mục sau khi giải nén MarlinConfiguration.zip là MarlinConfiguration.
Trong thư mục MarlinFirmware, sẽ có một thư mục con tên là Marlin hãy copy những file sau từ MarlinConfiguration/config/examples/Creality/Ender-3 Pro/CrealityV1, vào thư mục này:
_Bootscreen.hConfiguration.hConfiguration_adv.h_Statusscreen.h
Trong thư mục MarlinFirmware , Edit file platformio.ini , thay đổi default_envs = melzi_optimized
Tôi sẽ giả định rằng bạn đã cài đặt xong phần mềm python và platformio. Trong thư mục MarlinFirmware, hãy chạy lệnh sau
để compile firmware mới, ở thời điểm tôi viết bài này, phiên bản marlin là 2.0.9.6$ platformio run
--------------------------------------------------------------------------------------
Verbose mode can be enabled via `-v, --verbose` option
CONFIGURATION: https://docs.platformio.org/page/boards/atmelavr/sanguino_atmega1284p.html
PLATFORM: Atmel AVR (3.4.0) > Sanguino ATmega1284p (16MHz)
HARDWARE: ATMEGA1284P 16MHz, 16KB RAM, 124KB Flash
DEBUG: Current (simavr) On-board (simavr)
PACKAGES:
- framework-arduino-avr @ 5.1.0
- toolchain-atmelavr @ 1.70300.191015 (7.3.0)
Converting Marlin.ino
LDF: Library Dependency Finder -> https://bit.ly/configure-pio-ldf
LDF Modes: Finder ~ chain, Compatibility ~ soft
Found 6 compatible libraries
Scanning dependencies...
Dependency Graph
|-- U8glib-HAL @ 0.5.2
|-- SPI @ 1.0
|-- Wire @ 1.0
Building in release mode
Compiling .pio/build/melzi_optimized/src/src/inc/Warnings.cpp.o
Linking .pio/build/melzi_optimized/firmware.elf
Checking size .pio/build/melzi_optimized/firmware.elf
Advanced Memory Usage is available via "PlatformIO Home > Project Inspect"
RAM: [=== ] 29.4% (used 4820 bytes from 16384 bytes)
Flash: [==========] 99.6% (used 126450 bytes from 126976 bytes)
======================================================================================
Environment Status Duration
--------------- -------- ------------
melzi_optimized SUCCESS 00:00:07.384Firmware đã được build xong, nó nằm ở .pio/build/melzi_optimized/firmware.hex
Bây giờ chúng ta sẽ nối máy tính với máy in 3D thông qua cổng mini USB và upload firmware.
platformio run --target upload -vTôi sử dụng -v (verbose), nó sẽ hiển thị chính xác command mà platformio sử dụng để upload firmware lên mạch máy in 3D.
Command đó nằm ở dòng thứ 6.
1
2
3
4
5
6
7
8
9
10
11
12
13
14
15
16
17
18
AVAILABLE: arduino
CURRENT: upload_protocol = arduino
BeforeUpload(["upload"], [".pio/build/melzi_optimized/firmware.hex"])
Auto-detected: /dev/ttyUSB0

avrdude -v -p atmega1284p -C /home/nguyenvinhlinh/.platformio/packages/tool-avrdude/avrdude.conf -c arduino -b 57600 -D -P /dev/ttyUSB1 -U flash:w:.pio/build/melzi_optimized/firmware.hex:i

avrdude: Version 6.3, compiled on Sep 12 2016 at 15:21:49
         Copyright (c) 2000-2005 Brian Dean, http://www.bdmicro.com/
         Copyright (c) 2007-2014 Joerg Wunsch

         System wide configuration file is "/home/nguyenvinhlinh/.platformio/packages/tool-avrdude/avrdude.conf"
         User configuration file is "/home/nguyenvinhlinh/.avrduderc"
         User configuration file does not exist or is not a regular file, skipping

         Using Port                    : /dev/ttyUSB0
         Using Programmer              : arduino
         Overriding Baud Rate          : 57600
Khả năng rất cao là chạy lệnh platformio run --target upload -v không thành công, nó chí build xong firmware chứ ko có upload được. Error log như sau:
avrdude: stk500_recv(): programmer is not responding
avrdude: stk500_getsync() attempt 1 of 10: not in sync: resp=0xdb
avrdude: stk500_recv(): programmer is not responding
avrdude: stk500_getsync() attempt 2 of 10: not in sync: resp=0xdb
Lý do bị lỗi này là vì baud rate -b 57600 không chính xác , Để khắc phục lỗi này, bạn chỉnh sửa -b 115200 sau đó chạy lại trên terminal.
Command sẽ trông như sau.
avrdude -v -p atmega1284p -C /home/nguyenvinhlinh/.platformio/packages/tool-avrdude/avrdude.conf \
        -c arduino -b 115200 -D -P /dev/ttyUSB1 -U flash:w:.pio/build/melzi_optimized/firmware.hex:i
Đến đây là đã kết thúc quá trình upload firmware mới lên máy in 3D Creality Ender-3 Pro. Trên máy in 3D, nó sẽ yêu cầu bạn initialize lại EPROOM,
bạn hãy đồng ý. Nếu không hãy làm như sau Configuration > Advanced Settings > Initialize EPROOM. Sau đó, hãy kiểm tra version
About Printer > Printer Info , nó sẽ là 2.0.9.6.
![[7] Ender-3 Pro - Marlin 2.0.9.6](/image/posts/2023-05-20-Huong-dan-cach-update-firmware-cho-Ender-3-Pro/7.jpeg)
In this tutorial, I would like to introduce a new topic - How to override context params when deploy talend job. In general, there are two method
Before going further with these two method, I would like to establish a list of context variable and write a small tJava code to print out these context variables.
| Variable Name | Variable Type | Value |
|---|---|---|
| var_1 | String | var_1_original_content |
| _var_2 | String | var_2_original_content |
| var_3 | Password | password |
| var_4 | int - Integer | 1 |
| var_5 | float - Float | 2.2 |
| var_6 | double - Double | 3.3 |
| var_7 | Date | 2023-05-11 00:00:00 |
![[1] Context](/image/posts/2023-05-12-Talend-Overriding-context-params-when-deployment/1.png)
Then, I create a new tJava component with the following content.
System.out.println("Hello World!");
String var1 = context.var_1;
String var2 = context._var_2;
String var3 = context.var_3;
Integer var4 = context.var_4;
Float var5 = context.var_5;
Double var6 = context.var_6;
Date var7 = context.var_7;

System.out.println("context.var_1: "  + var1);
System.out.println("context._var_2: " + var2);
System.out.println("context.var_3: "  + var3);
System.out.println("context.var_4: "  + var4);
System.out.println("context.var_5: "  + var5);
System.out.println("context.var_6: "  + var6);
System.out.println("context.var_7: "  + var7);
Now, I build job, choose Override parameter’s value, for quick value defining, I choose Value from selected context, and Finish. A zip file will be generated and it’s ready to execute.
![[2] Build Step 1](/image/posts/2023-05-12-Talend-Overriding-context-params-when-deployment/2.png)
![[3] Build Step 2](/image/posts/2023-05-12-Talend-Overriding-context-params-when-deployment/3.png)
![[4] Build Step 3](/image/posts/2023-05-12-Talend-Overriding-context-params-when-deployment/4.png)
After you extract the zip file, you gonna see file directory tree like this.
![[5] Extracted directory](/image/posts/2023-05-12-Talend-Overriding-context-params-when-deployment/5.png)
To execute the job, in my case, you need to run the following command. And, as you can see, our context parameters has been printed well.
$ pwd
C:\Users\Nguyen Vinh Linh\Temporary\etl_01_test_override_context_params_1.0\etl_01_test_override_context_params

$ .\etl_01_test_override_context_params\etl_01_test_override_context_params_run.ps1
Hello World!
context.var_1: var_1_original_content
context._var_2: var_2_original_content
context.var_3: original_password
context.var_4: 1
context.var_5: 2.2
context.var_6: 3.3
context.var_7: Thu May 11 00:00:00 ICT 2023
Now, we are ready to go the main part - Config runtime parameters via file & executable scripts.
file.propertiesOpen Default.properties with your your favorite text editor and edit this file to update context params.
#this is context properties
#Thu May 11 12:51:57 ICT 2023
_var_2=var_2_original_content
var_1=var_1_original_content
var_3=enc\:routine.encryption.key.v1\:yw2kFUbYTflWCDmJafHrHq1+vdJ6QPYjQebpT0pO1NcoDTJc5A++/y67rudl
var_4=1
var_5=2.2
var_6=3.3
var_7=2023-05-11 00\:00\:00
At this step, it’s important to escape special character if you play with datetime type. In my case, it’s var_7.
This is my content of files
etl_01_test_override_context_params_run.ps1$fileDir = Split-Path -Parent $MyInvocation.MyCommand.Path
cd $fileDir
java '-Dtalend.component.manager.m2.repository=%cd%/../lib' '-Xms256M' '-Xmx1024M' -cp '.;../lib/routines.jar;../lib/log4j-slf4j-impl-2.13.2.jar;../lib/log4j-api-2.13.2.jar;../lib/log4j-core-2.13.2.jar;../lib/jboss-marshalling-2.0.12.Final.jar;../lib/dom4j-2.1.3.jar;../lib/slf4j-api-1.7.29.jar;../lib/crypto-utils-0.31.12.jar;etl_01_test_override_context_params_1_0.jar;' context_params_test.etl_01_test_override_context_params_1_0.etl_01_test_override_context_params --context=Default $args$args will pass all arguments to running script.
etl_01_test_override_context_params_run.sh#!/bin/sh
cd `dirname $0`
ROOT_PATH=`pwd`
java -Dtalend.component.manager.m2.repository=$ROOT_PATH/../lib -Xms256M -Xmx1024M -cp .:$ROOT_PATH:$ROOT_PATH/../lib/routines.jar:$ROOT_PATH/../lib/log4j-slf4j-impl-2.13.2.jar:$ROOT_PATH/../lib/log4j-api-2.13.2.jar:$ROOT_PATH/../lib/log4j-core-2.13.2.jar:$ROOT_PATH/../lib/jboss-marshalling-2.0.12.Final.jar:$ROOT_PATH/../lib/dom4j-2.1.3.jar:$ROOT_PATH/../lib/slf4j-api-1.7.29.jar:$ROOT_PATH/../lib/crypto-utils-0.31.12.jar:$ROOT_PATH/etl_01_test_override_context_params_1_0.jar: context_params_test.etl_01_test_override_context_params_1_0.etl_01_test_override_context_params --context=Default "$@"$@ similar to $args but in shell script, it will pass all arguments to running script.
To override context parameters, I just need to add --context_param var_1=var_1_value when execute the script. For example
#Powershell
$ .\etl_01_test_override_context_params\etl_01_test_override_context_params_run.ps1 --context_param var_1=var1 --context_param _var_2=var2 --context_param var_3=new_password --context_param var_7="2023-05-3 23:59:59"

Hello World!
context.var_1: var1
context._var_2: var2
context.var_3: new_password
context.var_4: 1
context.var_5: 2.2
context.var_6: 3.3
context.var_7: Wed May 03 23:59:59 ICT 2023
#Bash
$ .\etl_01_test_override_context_params\etl_01_test_override_context_params_run.sh --context_param var_1=var1 --context_param _var_2=var2 --context_param var_3=new_password --context_param var_7="2023-05-3 23:59:59"
Hello World!
context.var_1: var1
context._var_2: var2
context.var_3: new_password
context.var_4: 1
context.var_5: 2.2
context.var_6: 3.3
context.var_7: Wed May 03 23:59:59 ICT 2023Good luck!
java-11-openjdkDue to Talend Open Studio prerequisites link, we need to install OpenJDK 11 (recommended distribution: Zulu) or OracleJDK 11.
In this tutorial, I used OpenJDK 11 provided by Fedora package repository.
![[1] Talend Open Studio prerequisites](/image/posts/2023-05-08-How-to-install-Talend-Open-Studio-on-Fedora-37/1.png)
Package information:
$ sudo dnf info java-11-openjdk

Installed Packages
Name         : java-11-openjdk
Epoch        : 1
Version      : 11.0.18.0.10
Release      : 1.fc37
Architecture : x86_64
Size         : 1.2 M
Source       : java-11-openjdk-11.0.18.0.10-1.fc37.src.rpm
Repository   : @System
From repo    : updates
Summary      : OpenJDK 11 Runtime Environment
URL          : http://openjdk.java.net/
License      : ASL 1.1 and ASL 2.0 and BSD and BSD with advertising and GPL+ and GPLv2 and
               GPLv2 with exceptions and IJG and LGPLv2+ and MIT and MPLv2.0 and Public
               Domain and W3C and zlib and ISC and FTL and RSA
Description  : The OpenJDK 11 runtime environment.
Package installation:
$ sudo dnf install java-11-openjdkjava with alternatives commandIn this step, we use command alternatives to set java version systemwide, java-11-openjdk.x86_64 is selected with option 3.
sudo alternatives --config java

There are 3 programs which provide 'java'.

  Selection    Command
-----------------------------------------------
*  1           java-17-openjdk.x86_64 (/usr/lib/jvm/java-17-openjdk-17.0.6.0.10-1.fc37.x86_64/bin/java)
   2           java-1.8.0-openjdk.x86_64 (/usr/lib/jvm/java-1.8.0-openjdk-1.8.0.362.b09-2.fc37.x86_64/jre/bin/java)
 + 3           java-11-openjdk.x86_64 (/usr/lib/jvm/java-11-openjdk-11.0.18.0.10-1.fc37.x86_64/bin/java)

Enter to keep the current selection[+], or type selection number: 3JAVA_HOMEI used shell named zsh, I will configure JAVA_HOME in .zshrc file which located in ~/.zshrc. If you use bash, you will need
to configure .bashrc. You can trace the java home path using alternatives in Step 2. For me, the value is /usr/lib/jvm/java-11-openjdk-11.0.18.0.10-1.fc37.x86_64
export JAVA_HOME="/usr/lib/jvm/java-11-openjdk-11.0.18.0.10-1.fc37.x86_64After download Talend Open Studio TOS_DI-20211109_1610-V8.0.1.zip, and extract, you gonna see a list of file & directory.
$ ls -l
total 280
drwxr-xr-x. 1    136 Aug 26  2014 about_files
drwxr-xr-x. 1    660 May  8 17:00 configuration
drwxr-xr-x. 1   7170 Nov  9  2021 features
-rwxr-xr-x. 1    605 Nov  9  2021 license.txt
-rwxr-xr-x. 1  11840 Nov  9  2021 NOTICE.txt
drwxr-xr-x. 1    112 Nov  9  2021 p2
drwxr-xr-x. 1  59446 Nov  9  2021 plugins
drwxr-xr-x. 1      0 May  8 16:26 temp
-rwxr-xr-x. 1  80160 Jun 11  2021 TOS_DI-linux-gtk-aarch64
-rwxr-xr-x. 1    259 Nov  9  2021 TOS_DI-linux-gtk-aarch64.ini
-rwxr-xr-x. 1  74675 Aug 20  2014 TOS_DI-linux-gtk-x86_64
-rwxr-xr-x. 1    259 Nov  9  2021 TOS_DI-linux-gtk-x86_64.ini
drwxr-xr-x. 1     16 Oct 29  2021 TOS_DI-macosx-cocoa-aarch64.app
drwxr-xr-x. 1     16 Oct 29  2021 TOS_DI-macosx-cocoa.app
-rwxr-xr-x. 1    410 Nov  9  2021 TOS_DI-macosx-cocoa.ini
-rwxr-xr-x. 1  91512 Aug 19  2021 TOS_DI-win-x86_64.exe
-rwxr-xr-x. 1    259 Nov  9  2021 TOS_DI-win-x86_64.ini
drwxr-xr-x. 1     76 May  8 16:27 workspace
You need to execute this file named TOS_DI-linux-gtk-x86_64 and done. Good luck.
![[2] Open Talend Open Studio](/image/posts/2023-05-08-How-to-install-Talend-Open-Studio-on-Fedora-37/2.png)
Sometimes, playing CSGO on Fedora (Gnome) gives you this message.
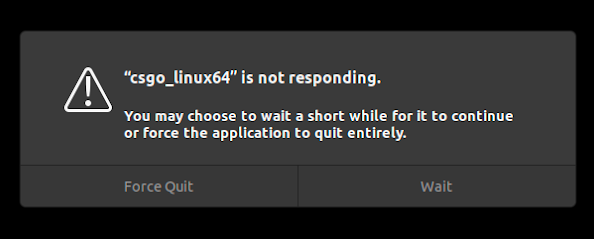
It’s because GNOME detects csgo_linux64 process unresponsive. You can fix this issue by setting the timeout to 0, by default, it’s 5000 milliseconds.
$ gsettings set org.gnome.mutter check-alive-timeout 0
In this post, I would like to take an example building html file for jekyll blog.
from ruby:3.2.0 as build

WORKDIR /opt/nguyenvinhlinh.github.io
COPY . /opt/nguyenvinhlinh.github.io

RUN bundle config set --local deployment true
RUN bundle install
RUN bundle exec jekyll build --destination=/opt/nguyenvinhlinh.github.io/dist

FROM scratch as release
COPY --from=build  /opt/nguyenvinhlinh.github.io/dist /
The build step will make statis file in /opt/nguyenvinhlinh.github.io/dist, then at release stage, it copies all files from that dist directory to /
docker build command$ mkdir -p /var/tmp/nguyenvinhlinh.github.io-dist
$ docker build -f Dockerfile --target=release --output type=local,dest=/var/tmp/nguyenvinhlinh.github.io-dist .
[+] Building 29.7s (12/12) FINISHED
=> [internal] load .dockerignore 0.0s
=> => transferring context: 120B 0.0s
=> [internal] load build definition from Dockerfile 0.0s
=> => transferring dockerfile: 424B 0.0s
=> [internal] load metadata for docker.io/library/ruby:3.2.0 1.8s
=> [1/5] FROM docker.io/library/ruby:3.2.0@sha256:98e340a1e5a9a61ee0c30e464a058da093ab8179460ed096a2a763a3abaa6c47 0.0s
=> CACHED [2/5] WORKDIR /opt/nguyenvinhlinh.github.io 0.0s
=> [internal] load build context 0.1s
=> => transferring context: 103.72kB 0.0s
=> [build 3/6] COPY . /opt/nguyenvinhlinh.github.io 0.1s
=> [build 4/6] RUN bundle config set --local deployment true 0.7s
=> [build 5/6] RUN bundle install 23.7s
=> [build 6/6] RUN bundle exec jekyll build --destination=/opt/nguyenvinhlinh.github.io/dist 2.6s
=> [release 1/1] COPY --from=build /opt/nguyenvinhlinh.github.io/dist / 0.2s
=> exporting to client 0.2s
=> => copying files 12.10MBIn this step, the key point here is about to copy all files from stage named release to host directory at /var/tmp/nguyenvinhlinh.github.io-dist.
Good luck, have fun!
First of all, it’s important to know how much space has been used for journalctl log. There are many method to get this information, in this post, I would like to introduce two method.
du command), given that logs stored in /var/log/journal. You can use this following command.$ du --human-readable --summarize /var/log/journal
3.0G /var/log/journal
$ du -sh /var/log/journal
3.0G /var/log/journaljournalctl --disk-usage$ journalctl --disk-usage
Archived and active journals take up 2.8G in the file system.Now, come back to our main topic - deleting journalctl log safely.
$ journalctl --vacuum-time=7d
Vacuuming done, freed 0B of archived journals from /run/log/journal.
Vacuuming done, freed 0B of archived journals from /var/log/journal/f5393db751dc400898dc12ef55768680.
Vacuuming done, freed 0B of archived journals from /var/log/journal.G for Gigabyte,
M for Megabyte, K for Kilobyte.$ journalctl --vacuum-size=1G
Vacuuming done, freed 0B of archived journals from /var/log/journal.
Vacuuming done, freed 0B of archived journals from /run/log/journal.
Vacuuming done, freed 0B of archived journals from /var/log/journal/f5393db751dc400898dc12ef55768680.